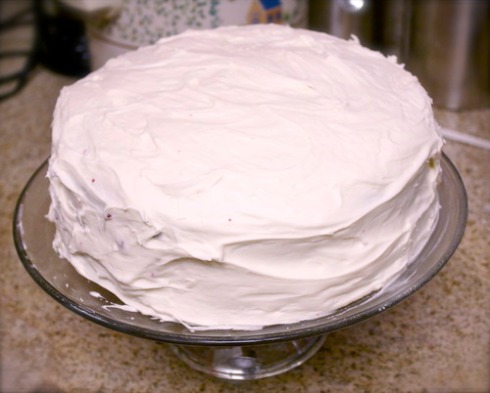
So this is what it’s like to “have my cake and eat it too.”
You can imagine how much time and effort went into this night-long marathon of cooking and baking at Amanda’s just by the fact that I had to break it up into 3 separate posts. I don’t know how professional chefs and cooks do it nightly. But I suppose that’s just one of the reasons why I and thousands of others around the globe enjoy writing about food and cooking.
And much respect to bakers! This was probably the most complicated baking project I endeavored (or at least helped with), other than the lopsided Red Velvet I made back in the early Spring. It’s so worth it though, when you toil over something like a 3-tiered cake with frosting from scratch. After we made this, I spent the next few days indulging on the third that I took home, slice by slice. I especially enjoyed it after a long day at work. Wine is great, a gourmet meal possibly better – but sometimes a rich, thick, three-layered almond–and-nutella cake is really what you need to wind down.
Almond Buttermilk cake with Nutella frosting, from Confessions of a Tart (We took a vanilla cake recipe from one post and a frosting recipe from another and put them together).
- 3 3/4 cups cake flour
- 2 1/2 cups sugar
- 1 tablespoon plus 2 3/4 teaspoons baking powder
- 1/2 teaspoon salt
- 2 1/2 sticks (10 ounces) unsalted butter, at room temperature
- 1 1/4 cups plus 1/3 cup buttermilk
- 5 whole eggs
- 2 egg yolks
- 2 1/2 teaspoons vanilla extract (or almond, as we used)
*Another tool I must buy: a stand mixer. This could be done with a hand mixer, but it would take much, much longer and much more effort.
Preheat the oven to 325°F. Butter three 9-inch round cake pans and line the bottom of each pan with a round of parchment or waxed paper. Then butter the paper. (This really helps in removal after baking – a crucial mistake I made in the Red Velvet project).
Combine the cake flour, sugar, baking powder, and salt in a large mixing bowl. Blend for 30 seconds, on low speed. Add the butter and 1 1/4 cup of the buttermilk. Mix on low speed briefly to blend; then raise the speed to medium and beat until light and fluffy, for about 2 to 3 minutes.
In another bowl, whisk together the whole eggs, egg yolks, almond, and the remaining 1/3 cup buttermilk until well blended. Pour one-third of the egg mixture into the cake batter at a time, allowing it to fold completely before adding the next third. After the egg mixture is incorporated, pour it in thirds into each cake pan. To help even the batter out for a smoother, flatter-topped cake, put both hands around the sides of the pan and swish it in a semi-circular motion, swishing it to the left and then to the right. (Kind of like how a washing machine does with clothes). The top of the batter will spread out evenly to the sides.
Bake for 26 to 28 minutes. (We’d rotate the pans about 180 degrees every 9 or 10 minutes to bake evenly). Test for doneness by inserting a cake tester or wooden toothpick in the center and it comes out clean. Turn the layers out onto wire racks by placing a rack on top of a pan, inverting it, and lifting off the pan. Peel off the paper liners and let cool completely. When the layers have cooled, place a cardboard cake board on top of a layer, invert again, and lift off the rack. To make the layers easier to handle, wrap them on their boards completely in plastic, so they don’t dry out, and refrigerate them. (Amanda actually put them in the freezer for a bit, which cooled and set them quicker and didn’t ruin them at all).
The Simple Syrup (adapted from the Rum-lime syrup)
- 1/3 cup water
- 3 tablespoons sugar
- almond or vanilla extract, (can also use lemon zest/juice, strawberry puree, etc. depending on your desired cake flavor)
In a small saucepan set over medium high heat, bring all the ingredients to a simmer until the sugar dissolves, stirring occasionally. Allow to cool to room temperature.
- 5 large egg whites
- 1 1/4 cup of granulated sugar
- 4 sticks (1 lb) of unsalted butter, at room temperature, cut into 1T chunks
- 1 tsp vanilla extract
- 1 cup Nutella, at room temperature
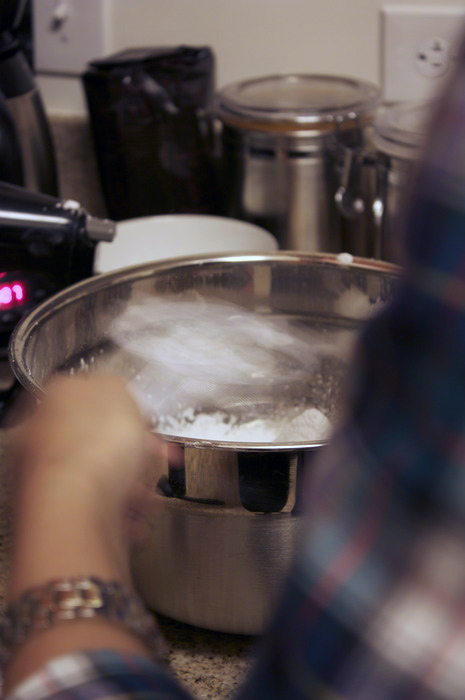
In a sauce or medium-sized pan over medium heat, bring about 3 inches of water to a gentle simmer. Put the egg whites and sugar in a large heat-proof bowl and set over the simmering water. The bottom of the bowl should not touch the water. Whisk egg whites and sugar together constantly until the sugar is completely dissolved (test by feeling between your fingers – should be sticky yet smooth, not grainy). This takes about 5 minutes, maybe more (it was more this time around).
Pour the egg mixture to the bowl of a stand mixer (Irene from Confessions notes to wipe the condensation from the bowl so as not to get it on the mixture – it won’t form if water gets in it). Set the mixer to medium-high speed and whip until the whites are cool and form firm peaks.
Once the egg whites are stiff, lower the speed to medium and add the butter one chunk at a time. Let each chunk mix before adding another. Continue to add until all the butter is incorporated.
Continue mixing; you will have to for quite some time (I don’t remember how much time passed but it felt like a least 20 minutes). The buttercream takes awhile to come together, and even Irene notes to be patient. It looks weird and not like frosting at all for the longest time until it finally comes together and looks lovely.
When the buttercream is smooth, fold Nutella into half of the buttercream, and leave the other half to frost the outside of the cake (or make it all Nutella and get hopped up on tons of chocolate-hazelnut frosting).
Assembly:
Amanda decided to add sliced strawberries to make one intense, towering cake. So to assemble, take a cake layer, brush the tops with the almond-flavored syrup, smooth on a layer of nutella buttercream, and arrange sliced strawberries. Then place the next cake layer and repeat each step.
On the last cake layer, after the syrup, smooth some regular buttercream on top and a thin layer around the sides (having a proper frosting knife helps). Pop this in the fridge to cool for about 15-20 minutes. Once cooled, add a thicker layer of frosting to cover evenly. Arrange sliced strawberries on top to your liking.
We ended up having a TON of Nutella frosting left after finishing the cake – I took a tubful home and ended up using them for cupcakes, which I’ll show you in a later post. 🙂


